


Create New Project


Main Screen/Smart Icons/Open project


1.
Click the ‘Open/Create’ Icon
2.
Type the new project name at the ‘file name’
field
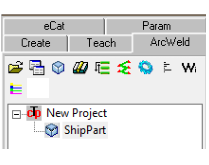
3.
Mouse right click on “SmartTcp Default
Project”
4.
Select “Insert Model”
5.
Choose the 3D CAD part model and select
Open
6.
Mouse right click on the part model and
select “add weld robot” option.
 7.
Mouse right click on the part model and
select “Set as activate” option (or double
click)
7.
Mouse right click on the part model and
select “Set as activate” option (or double
click)
7.
Mouse right click on the part model and
select “Set as activate” option (or double
click)
Open an Existing Project
1.
Click on “Create/Open Model”
Icon
2.
Select the project and click Open
3.
Mouse right click on the part
model and select “Set as activate”
option (or double click)


